Saturday, December 26, 2009

Brussels Sprouts

So we’re coming down the home stretch to Christmas dinner.  We made the plum pudding the weekend after Thanksgiving and the brown beef stock for the gravy, which was frozen in 2 qt. plastic bags.  The standing rib roast is waiting in the fridge, and on Christmas day will be going into a hot oven in the late morning.  We’re going to have Yorkshire pudding, herb-roasted potatoes, baby buttered peas, glazed carrots, and a mixture of roasted cauliflower flowerets and Brussels sprouts.


Many people find Brussels sprouts undesirable as a vegetable.  They are often eschewed as “those little cabbages,” and when overcooked they do emit sulfur compounds that are bitter and odiferous, making them unappetizing.  However, if properly handled, they are crisp and tasty, with a mild bitterness that is not displeasing.  Those that have been touched by fall’s frosts are the sweeter for the nipping. 

One way to make them less bitter is to cut them in half, exposing their inner leaves, which will allow the bad flavor elements to leach out.  Another is to give them a preliminary blanching in boiling water for a minute before draining and proceeding with your recipe.


Brussels sprouts provide a hearty winter vegetable to accompany turkey, steaks or liver, but they really love pork, duck or goose.  They pair well with cauliflower, Jerusalem artichokes, leeks and chestnuts, whether as a vegetable combination or in a wholesome fall vegetable pie.

Brussels sprouts, a member of the Brassica oleracea family, are derived from the wild cabbage and, therefore, other family members include collards, kohlrabi and kale.  Something akin to the modern Brussels sprout was cultivated in Italy, but Belgium has recorded evidence of its growing there in 1587, as the vegetable proliferated in northern Europe due to the cool climate in which it thrives.

Rich in vitamin C, Brussels sprouts also have large amounts of vitamin A, folic acid and dietary fiber.  Some of their unappetizing compounds are actually thought to be helpful in preventing colon cancer

Through the fall months, one can purchase local Brussels sprouts on long stems at farmers’ markets.  The little green heads grow up and down the stalk, becoming 1” to 2” in diameter at maturity.  The heads should be tight with bright green leaves.  Any that are over mature, wilted or worm-eaten should be discarded.  Sometimes one or two leaves at the base may have to be removed.  It’s advisable to trim the base of each sprout and, using a paring knife, cut a small X to facilitate even cooking.

After prepping the sprouts, they should be washed and parboiled in salted water for 5 to 6 minutes or until almost tender.  They can be refreshed in cold water and saved for final cooking later.  Whether braised in butter, cooked in cream or cheese sauce, or braised with chestnuts, cook slowly to allow the sprouts to absorb the sauce, but don’t overcook.

Brussels sprouts also lend themselves to roasting in a hot oven.  Toss in olive oil, salt and pepper and scatter on a parchment lined sheet pan before cooking at 425 degrees for 25 minutes, tossing once or twice. 

Sunday, December 20, 2009

Cookies


At our house, Christmas means Rosemary will be baking her wide variety of Christmas cookies that she only makes this time of year.   Her Festive Cherrry-ettes (aka Thumbprint cookies) are a shortbread cookie, studded with a red cherry or fruit jam, that my Mom used to make, and are wildly popular amongst my siblings.  Her rum balls are legendary, and the date and Rice Krispy snowballs with coconut are tops in my book.  The sugar cookies are cut into Santas, Christmas trees, reindeer, bells and other seasonal shapes and decorated with a wide variety of red, green, pink and other colorful frostings along with decorative sugar crystals and nonpareils.  Of course she makes gingerbread molasses cookies as well as toffee bars, date filled sour cream cookies, Baklava, chocolate brownies and a Greek almond crescent cookie known as Kourabiedes.  Her brother Gary loves her divinity fudge, but that more a confection than an actual cookie.

Cookies, known as biscuits in England, can be crisp or chewy depending on how they are made.  There are a numerous kinds of cookies, including drop cookies, formed from a soft dough that spreads out as it cooks (usually with chocolate chips and/or oatmeal), cut-out cookies which are made with a stiffer dough and which retain their shape while cooking such as sugar or butter cookies, hand-shaped cookies which are formed from refrigerated batters that are piped or molded, like ladyfingers or madeleines, bar cookies which are cut from a thin cake-like mass baked in a shallow pan like brownies and date or nut bars, and ice-box cookies which are sliced from a pre-made cylinder of dough stored in the refrigerator until ready to be baked.

Festive Cherryettes
The amount and type of fat one includes in their cookie recipe is one of the key determinants in the final texture of a cookie.  While fat affects the richness and moistness of the final cookie, it also has an impact on the cookie’s suppleness.  Butter melts are a lower temperature than shortening or margarine, allowing the cookie to spread out more before its protein and starches have set.  In shortbread cookies, the 15% moisture content in butter is usually the only moisture included in these low-egg cookies, contributing to shortbread’s crumbly texture.

Normally pastry or all-purpose flours are used for cookies, however bread flour and cake flours are used in some instances where spreading is discouraged by their gluten content.  For the most part, however, gluten development in cookies is not desirable as it tends to toughen the resulting product, although high protein content means more browning during baking.  Low protein flours are often coupled with higher amounts of moisture in recipes, producing a puffed up cake-like cookie. 


Peanut Butter Cookies
For the most part granulated sugar is used in cookies, although moist brown sugars help the dough to spread and confectionary sugar with its added cornstarch prevents spread and keeps the texture dry.  Molasses and honey attract moisture from the air and keep cookies soft.

Eggs soften cookies and help then rise and stay pliable.  When used, they provide the bulk of the moisture in the cookie and bind the flour particles together while cooking.  Their fat and emulsifiers keep the cookie moist and rich.

Toffee Bars

Thursday, December 10, 2009

Plum Pudding


A Christmas tradition in our family is the serving of the plum pudding for dessert after the roast beef and Yorkshire pudding.  My grandfather was from England where this dish is more commonly known as Christmas pudding, and it is reserved for a once a year eating on this holy day.  We have a recipe that has been handed down in the family for years.  We make it right after Thanksgiving and allow it to age in a cool place until Christmas day.  I have read that in some families, they make the plum pudding a year in advance, but that seems a little extreme to me, so we’ll stick with the Thanksgiving day making as my Mom used to do.

Plum pudding contains no plums.  It is a mixture of dried fruits like raisins, currants, dates and sultanas, citron or candied peel, and nuts like almonds.  It includes rich spices such as cinnamon, nutmeg and cloves, brown sugar, brandy or dark rum, eggs, breadcrumbs and suet.  It can also have flour, lemon or orange zest, carrot or apple.  It is very dark, almost black, when removed from its mold, due to the dark sugars used and its long cooking time.  The inclusion of beef suet harkens back to earlier times when English puddings included meat. 

Sometimes cooks secrete a silver coin, thimble or wishbone as a sign of good luck or wealth for the lucky recipient. 


Once all the ingredients are mixed, the pudding is placed in a rounded mold and steamed for 5 or 6 hours.  When it is cool, we wrap our mold in wax paper and store it in the garage.  On Christmas day, we bring it in and steam it for another hour while we eat Christmas dinner. 

Rosemary has previously made and refrigerated the hard sauce by creaming some butter with confectionary sugar, vanilla and brandy.   She also makes the ever popular, in the Palmer family, foamy sauce, which includes similar ingredients plus whisked egg and cooked in a double boiler until frothy and the consistency of cream.  It is quite sweet.


The pudding is removed from the mold onto a serving plate, topped with a sprig of holly, and doused with warm brandy and ignited.  It is brought to the darkened dining room table, flaming, to the gasps of pleasure from the assembled revelers. 

Once the flames die down, it is served with a wedge of hard sauce and a spoonful of the foamy sauce topping the rich, fruity mixture.  It is always a hit at our house, and a holiday ritual that Rosemary and I have carried on from my folks.  It’s not too late to start a plum pudding tradition for your holiday.


                   Plum Pudding

½ c. currants
1 ½ c. raisins
½ c. figs
½ c. dates
¼ c. citron
¼ c. candied orange rind
2 c. ground suet (3/8 lb.)
½ loaf day-old bread
1 ½ tsp salt
½ tsp nutmeg
3/4 tsp. cinnamon
1/4 tsp cloves
1 c. milk, scalded
½ c. brown sugar, firmly packed
4 eggs
2 TB red wine
2 TB Brandy

Look over currants and raisins with a hawk’s eye for stray bits of stem.  Cut up figs, dates, citron, candied orange rind, in tiny pieces with your kitchen scissors or a sharp knife.  Put suet through your food chopper, using medium blade.
Remove crusts from bread and crumble bread into small pieces into your larges bowl.  Now add salt, spices, scaled milk (in other words, milk that has been heated until a film, shows.  Not boiled) and sugar.  Mix these ingredients well and set aside to cool.  While this mixture cools, beat eggs until light and airy in a separate bowl.  Stir into crumb combination along with all fruits, suet, wine and brandy.  Mix thoroughly, pour into two small, ungreased, molds or one large mold (1 ½ qt) and  cover with close fitting lid or several taut layers of waxed paper tied on very securely.  Steam on top of stove for 5 hours.
Easiest way to steam, this pudding is to use our large roasting pan.  Place a roasting rack n bottom of the roaster (pie tins will do or any utensil which keeps pudding from resting on bottom of pan, fill roaster with enough boiling water to cover 2/3 of the mold and put on tight fitting lid.  As water evaporates keep filling roaster with boiling water to cover 2/3 of the mold.
This makes 1 plum pudding large enough to serve or feed 12.  You’ll find pudding keep beautifully in mold steamed in.  Cover top of mold tightly with waxed paper and store in cool, dark place.
When you are ready to reheat plum pudding for your wonderful dinner, heat in same fashion in which you steamed pudding in first place for 1 hr.  Let sit 15 minutes.
Sprinkle granulated sugar on top of hot pudding (sugar plus alcohol gives a brighter flame).  Pour two jiggers of any brandy or whiskey that is at least 80 proof over top.  Touch off with a match to top of pudding and you’ll have a real holiday conversation piece.

Hard Sauce

Work or cream 1/3 c. butter until soft, gradually mix in 1 c. confectionery  sugar and 1 tsp vanilla extract or 2 Tb Brandy.  Serve cold with the hot pudding.  Enough sauce for 6.

Foamy Sauce

Work or cream ½ c. butter then gradually work in 1 c. confectionery sugar until smooth.  Beat 1 egg in separate bowl until creamy.  Stir egg and 1 tsp. vanilla extract or 2 Tb sherry into creamed sugar and heat over boiling water stirring constantly until warm and thick as heavy cream.  This makes enough for 6.    


Thursday, December 3, 2009

Meat stocks


It’s not too early to be thinking about Christmas dinner as it is only a few weeks away.  I have many plans to make, but as Christmas dinner at our house involves roast beef and Yorkshire pudding, most of the menu is preordained.  Hors d’oeuvres can change from year to year, as can the vegetables, but potatoes are required and they call for a rich gravy.

I make my gravy with home made meat stock, so I usually make up a few gallons of stock in advance.  It freezes beautifully, and having some on hand is great for last minute braises, soups or stews.

Meat stocks, beef, chicken or veal, as well as vegetable stocks, have long been part of restaurant cooking, primarily when sauces were used more extensively then they are today.  To make a flavorful stock, it is best to use a combination of bones and meat.  While both will give off gelatin into the stock as their collagen breaks down, bones give off more than meat, but meat gives off more flavor.  While veal stock is the most gelatinous when made, it has a very neutral flavor.  Beef and chicken, on the other hand, if made with some meat, will have decidedly beef or chicken flavor.  


Stocks can be white or brown.  In a white stock, the ingredients are added in a raw state and the stock remains clear to slightly colored, whereas when the ingredients are either roasted in a hot oven or fried in oil to caramelize their exterior, they produce a brown stock. 

A classic stock is clear without cloudiness or gray impurities suspended within the broth.  This can only be accomplished if the cook pays strict attention during the stock’s initial phases of cooking.  First, if making a white stock, it is advisable to wash the bones and meat, place in a pot of cold water and slowly bring it to a boil.  As soon as the water starts to simmer, drain the ingredients into a colander and rinse them well.  This step removes surface impurities and coagulates proteins on the meat and bone surfaces, preventing them from making the stock cloudy.  If one browns their meat and bones first, this step can be eliminated.

The ingredients are again placed in cold water and slowly brought back to the simmer.  The cold water and slow heating allow the soluble proteins to migrate from the solids into the liquid, where they gather together in gray clusters which rise to the surface and are easily skimmed off.  At the same time, fats dissolve and rise to the surface, where the attentive cook removes them.  During this time, the pot is left uncovered, not only to permit evaporation and thus concentration of the cooking liquid, but also to aid in dehydration of the surface scum, making it easy to skim off.

The stock is then simmered at the laziest pace with only an occasional bubble breaking the surface for three to eight hours for beef, ninety minutes for chicken, and only 30 minutes for fish.  When the stock is strained, it should be cooled as rapidly as possible to prevent any bacteria build up. 


Brown Beef Stock


10 lbs beef bones
3 lbs shin of beef
1 lb onions, quartered
1 lb carrots, sliced in large chunks
1/2 lb celery, chopped into large chunks
3 bay leaves
A bouquet garni of thyme and parsley
1 Tbl peppercorns, whole


Brown the beef bones, shin and vegetables in a hot (425 degree) oven for 20 to 30 minutes, turning the ingredients over a couple of times so they are nicely browned.  Place all the browned ingredients into a large pot, cover with cold water and add the bay leaves, bouquet garni, and peppercorns.  Bring to a simmer, skimming any scum that rises to the surface.  After 10 minutes or so of simmering, most of the scrum will have risen, however continue to skim and scum and or fat that accumulates on the surface.  Simmer partially covered for 3 to 8 hours.


Strain the stock to remove the bones and other ingredients.  Cool rapidly and refrigerate.  Any remaining fat will congeal on the surface and can be removed.  Store the stock in 1 or 2 quart containers.  It is best to freeze the stock as soon as possible.  If using soon, it will keep in the ice box for 3 days, but should be re-boiled if kept beyond that time.

Friday, November 27, 2009

Corned Beef


Untrimmed brisket with brining crock

A couple of weeks ago at the Norwich Farmers’ Market, Ray Williams from Back Beyond Farm (http://www.backbeyondfarm.com/) had fresh beef brisket for sale.  I purchased a half brisket and brought it home to make my own corned beef.  It was so good, I picked up a second brisket this past weekend and am trying a slightly different brine to cure this one.

They sell corned beef in the supermarket, but these products are made in large industrial plants where time is at a premium, so speed dictates, and taste and flavor are secondary.  Instead of submerging the beef to be corned into a vat of brine with aromatics, and allowing the process to proceed at a natural pace, which can take from 1 to 2 weeks, the muscle is injected with brine, tumbled to distribute the cure, and cryovaced in plastic for delivery to the retailer.  Any curing is done in the bag.

I believe there is also a canned corn beef, but I can’t comment on how it is produced or how it gets in the can, so I avoid it. 

Different cuts of beef are candidates for salting including silverside, flank, bottom round and brisket, with the latter being the preferred piece.  The brisket is the piece of meat that covers the breast or lower chest of the beef, is where the majority of the beef’s weight falls when it lies down, and is one of the eight primal cuts on American beef.  As the brisket on a mature animal can weigh 10 to 15 lbs, it is often separated into two pieces, the “flat cut” and the fattier “deckle,” “point,” or “triangular” cut.  It is a tougher cut and is usually braised when cooked fresh. 
Trimmed flat cut
The “corn” in corned beef refers to the coarse salt crystals used to cure the beef, which are about the size of a kernel of corn.  Beef was salted to preserve it, the salting drawing out the moisture in the meat, allowing it to keep longer.  Corned beef is made by pickling the meat in brine comprised of salt, sugar, herbs and aromatics, allowing it to cure for a week or two in a cool place.  Thereafter it is rinsed off and poached at just about a simmer for 2 ½ to 3 hours, or until fork tender.  It can be served hot, but when cooled it can be sliced thinly and makes great sandwiches.
Brine coming to a simmer before being cooled

Here in the northeast we traditionally accompany corned beef with boiled potatoes, carrots, turnips, beets and cabbage, all cooked in the same broth the beef cooked in, for New England boiled dinner, and, of course, corned beef is an Irish specialty on St. Patrick’s Day.

Corned beef is a cousin to pastrami, which is corned beef rubbed with black pepper and spices and smoked.  It is usually served as a cold cut on sandwiches, whether cold or warmed up.  Coarse mustard and dill pickles make a common accompaniment. 


Here's the recipe I used:


Corned Beef (or Tongue)

4-6 lb brisket, flank or beef tongue
1 bouquet garni
1 carrot, chopped
1 onion,  chopped
1 celery stalk, chopped
1 leek, chopped
1/2 bulb of garlic

For the brine:
5 quarts of water
1 lb light brown sugar
3 lbs coarse sea salt
1 tsp black peppercorns
1 tsp juniper berries
5 cloves
4 bay leaves
A sprig of thyme
3 tbl saltpeter or Instacure #1

Put all the brine ingredients in a large pot and stir well to dissolve the salt and sugar and bring to the simmer.  Remove from the heat and cool completely, refrigerating the brine so its very cold.  Place your brisket or tongue in a non-metallic container and cover the meat completely with the cold brine.  You will need to use a plate or something to keep the meat submerged.  Place in a cool place for 5 to 10 days (pieces less than 6 lbs should be brined for the shorter time period)

Remove the meat from the brine, rinse well and soak in cold water for 24 hours.

Place brined beef in a pot, add the rest of the aromatics and fresh water to cover.  Poach very gently on top of the stove (or in a 275 degree oven) for 2 1/2 to 3 hours, or until completely tender and yielding when pierced with a fork.

Serve warm with potatoes, cabbage, beets, turnips and carrots cooked in the broth.


Saturday, November 21, 2009

Bread # 3


Over the past couple of weeks, we’ve examined bread flours, yeast, pre-ferments, and mixing of bread dough.  Now its time to understand fermenting the dough, retarding the dough, shaping the loaves, proofing and baking the final product.

If you’ve made traditional white bread in a loaf pan, the “fermenting” part of bread baking is what you know as the first rise.  During this time, the yeast in the dough is feeding on the sugars in the flour, producing carbon dioxide, alcohol and acids.  These chemical reactions contribute the bread’s flavor and aroma.  The carbon dioxide becomes trapped by the gluten network we created through kneading, and the bread rises.

Bacteria in the dough consume maltose, a sugar that yeast can’t digest, producing lactic and acetic acids, which provide a tangy flavor to the bread.  However fermenting bacteria won’t contribute significantly to the bread’s flavor unless it has at least eight hours of fermentation, so to receive the full benefit, one must retard the bread, by refrigerating it for a period of time.  Retarding can be done after the initial fermentation or after the loaves have been formed. 

While most bread recipes call for an initial rise to double the dough’s original bulk, I prefer to allow the dough to rise to triple its original bulk.  During this rise, I “turn” the dough once or twice.  In turning the dough, I gently lift it and fold the drooping sides into the center of the bowl, redistributing the yeast and its food supply, evening out the dough’s temperature and reinvigorating the yeast.  The gluten is strengthened by this action, and most of the air cells remain trapped in the dough. 

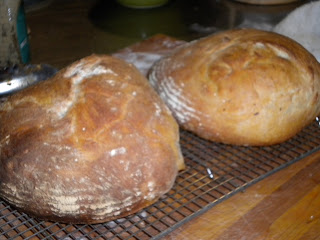
Once the dough is fully risen, its time to divide the dough into to pieces that you will later shape into the loaves to be baked.  Most of the breads I make do not use a bread pan, but are free-standing loaves, either shaped like a football with tapered ends or round loaves.   I do have some willow bread baskets that I use to proof my round loaves, and these leave distinctive coiled markings on the outside of the loaves when they are baked.  Other loaves I allow to proof on a couche, a piece of floured canvas used in professional bakeries, and which can, within its folds, hold several loaves.

The divided dough is allowed to rest for about 10 minutes to relax the gluten, which makes forming the loaves easier.  Shaping the loaves is an art form that varies from bakery to bakery.  Depending on the bread, shaping can be easy or very complex, but suffice it to say that one of the main objectives is to create a surface tension on the outside layer of the dough.


Once shaped, the loaves need to proof, or rise again before being baked.  Usually they rise to close to double their original size before being placed in the oven to cook. 

I use a baking stone in my oven on which I place my proofed loaves to bake.  I also score or slash my loaves with a razor blade to control the “oven spring,” that final rise that occurs in the oven before the heat kills the yeast.  By scoring the loaves, one weakens the surface tension is those areas the razor cuts, and this tends to control where the dough expands during these first few minutes of baking. 

Lastly, I spray my loaves during the first 10 minutes of baking with water from a spritzer.  Wetting the surface facilitates heat transfer to the loaves from the oven while also keeping the exterior flexible to maximize oven spring.  The result is a higher, lighter loaf with a crackling crust.


Como Bread
Pane di Como


Makes 2 round loaves


Biga: (Pre-ferment)
2/3 cup, 150 g, water, tepid
1 tsp, 5 g, instant yeast
1 1/2 cup, 250 g, unbleached bread flour


A day before you plan on baking, pour the water into a large bowl, add the yeast and flour and mix a stiff dough.  Turn out and knead a couple of minutes, round the dough, place it in an lightly oiled container, allow to sit at room temperature for an hour or so, then refrigerate until the next morning, removing the biga from the refrigerator an hour before you plan on mixing the rest of the dough.


Bread dough:
Biga, 450 g
1 3/4 cup, 400 g, water, tepid
1 1/2 tsp, 10 g, instant yeast
3 1/4 cup, 500 g, bread flour
2 tsp, 12.5 g, sea salt


Scrape the biga into a large bowl and pour the water over it, stirring to break the biga  up.  Stir in the yeast, flour and salt until a dough forms.  You can add just the water and flour and allow to rest for 25 minutes before adding the yeast and salt, if you wish.


Either knead the dough by hand for 10 to 15 minutes.  The dough will be sticky, so use some extra flour, but not too much.  If you use a stand mixer, knead with the dough hook on medium speed for 10 to 12 minutes until the dough is elastic and smooth.  To check that the dough is properly kneaded, tear off a small piece and stretch it into a "bakers' window" until it thin enough that you can see through it.  If it tears, continue to knead a few more minutes.


Transfer the dough to an oiled container, cover and allow the dough to double (or triple) in volume.  It will be very light and airy.  This can take 2 to 2 1/2 hours.  You can retard the dough at this point by placing it in the refrigerator.  You will need to turn it or deflate before refrigerating, and you may need to do so a second time in a few hours.  If not retarding, or after retarding, divide the dough into two pieces and allow to rest on a floured surface for 10 minutes before shaping.


Shape the dough into rounds, pulling across your board to stretch the outer surface of the dough taunt.  I place my rounded dough into floured willow baskets to rise, but they can also be placed on parchment paper and covered with plastic wrap to proof.


Preheat the oven to 500 degrees and place a baking stone on the second rack to preheat.  This can take up to an hour.  Place a cast iron skillet on the rack below the baking stone.


When the loaves are proofed, either slide the parchment paper onto the baking stone or onto a sheet pan in the oven.  If using baskets, the loaves can be turned onto the baking stone next to each other.  Place ice cubes in the cast iron skillet and quickly close the oven door.  Bake until the crust is glossy red-brown, 30 minutes or so.  Cool completely on bread racks before slicing.


Saturday, November 7, 2009

Bread #2


Biga

Flour, yeast, water and salt are the ingredients in bread.  Sounds simple, and in many ways it is, but the combination of these ingredients and the way they are handled can produce a large variety of different breads, each distinctive from the other.  How does this happen?  How can these four ingredients produce such a wide diversity of products with different crusts, different crumbs and different tastes? 

Let’s start with the flour.  Wheat is the most commonly used grain in bread production.  It’s main advantage over other grains like millet, barley, corn and rye is its’ gluten proteins.  These proteins are compact when dry and insoluble in water, but when they are wetted they change their shape, become elongated, and form and break bonds with other gluten proteins.  As they are both plastic and elastic, they allow the bread to change its shape under the pressure of kneading, while at the same time allowing it to return to its original shape when the pressure is removed.  The web created by the gluten strands are so strong that when carbon dioxide is released by fermenting yeast, it doesn’t break through the dough, but gets trapped inside, causing the dough to rise. 

Flour is composed of the outer bran, the fiber part, the inner endosperm, the starchy and protein part, and the germ, which contains multiple nutrients.  Through the milling process, the bran and germ, while full of nutrients and flavor, but which can go rancid in a short period of time, are removed from most bread flours.  However, stone ground flours, as the stones crush the grain more thoroughly than steel rollers, contain some bran and germ, thus they make more flavorful breads. 


Whole-wheat flours have not been sieved to remove the bran and germ, and while more nutritious than white breads, they are heavier, denser and darker in color.  Many whole-wheat recipes contain a combination of white and whole-wheat flour to make then lighter and more appetizing. 

The degree to which flour has been refined is known as its “extraction rate.”  This number represents the amount of the whole grain that remains after milling.  Whole-wheat flours are usually about 90% or greater.  White flours are between 70% and 72%, while many European flours are 72% to 78%, making them somewhat more flavorful than American flours. 

Different wheat flours contain different amounts of protein.   The higher the amount of protein, the “stronger” is the flour.  Bread flours, which include 12.5% to 14% protein, make the lightest, highest, chewiest loaves.  Cake flours, which have lower amounts of protein (7%), make tender baked goods.   All-purpose flours fall between bread and cake flours, in the 11-12% range.   King Arthur makes an Artisan European style flour that is 11.7% protein and their White Whole Wheat flour, ground from white, not red, wheat, is a great substitute for the heavier red winter whole-wheat flours. 

The other major ingredient that affects the final bread is the amount of hydration used.  Bakers use a system known as “bakers’ percentages” in calculating their recipes.  In this system, all ingredients are a percentage of the amount of flour in a recipe.  So a standard 65% hydration rate means that the water in the recipe is equal in weight to 65% of the flour used.  The higher the hydration rate, the softer, less elastic the dough, and an open-textured loaf is produced, while less water produces a firmer, denser loaf.


Next week we’ll discuss yeast, mixing and proofing techniques that also have an impact on the taste and texture of the bread produced.

Saturday, October 24, 2009

Bread


I’m excited that real, artisan, hand-crafted, organic bread is now available Fridays at South End Market, just up from the library in Bradford, where Calista is carrying Red Hen Bakery products, but you have to pre-order.  Red Hen breads come in paper, not plastic, bags, are crusty on the outside with a wonderful yeasty flavored crumb inside.  Different products have different crusts and crumbs, but every one I’ve tasted has been delicious.  On bread day, the seeded baguette I get on my way home is half devoured when I arrive.

During my youth in the 1950s and 1960s in Bradford, Mom made traditional  white loaf bread often, but Wonder Bread or its equivalent was available in the stores, so it was in the pantry in the bread box,  You know, it’s still around, with it homogeneous cake like interior inside a non-existent “crust.”  Spread it with peanut butter and marshmellow fluff for the quintessential “Fluffer-nutter,” but pardon me, the bread is insipid. 

Industrial America has figured out how to make a bread that had little human interaction with the product once the basic ingredients are mixed together.  It produces bread in a few hours from start to finish, whereas flavor and texture can only be developed over time.  It is not just in America that bread experienced a significant decline during this time, and many of those signature products of that earlier time persist even today.  In Europe, commercial bakeries’ cheap products bankrupted traditional shops, and inferior bread became prevalent for many years, with, of course, some vestiges of the past preserved in certain enclaves.

Fortunately, in the 1980s and ever since, the rise of traditional approaches to baking breads has been revived.  The methods of mixing the ingredients, manipulating the dough whether by kneading or turning, fermenting the dough, retarding the dough, shaping the dough, proofing the breads and baking them have been developed to maximize taste, aroma, structure of the crumb, texture and flavor.  These methods take time and some labor, but the resulting products are so much more than industrial breads that there is no comparison.  They have body, heft and a satisfying goodness that nourishes more than the body alone.


Now big bread companies have figured out how to make an artisan-like product by following similar production techniques and par-baking their breads before freezing them.  These breads can now be finished in a hot oven at the store for sale as baked on the premises breads, and some of them aren’t all that bad. 

There are many books on breads out there, but I will mention here some of my favorites.  The Bread Builders by Dan Wing, from Corinth, and Alan Scott tells not only the science of bread making, but also how to build your own wood fired bread oven.  The Taste of Bread by Raymond Calvel is an English translation from the original French and is one of the definitive texts on bread.  If you want to learn about real bread, read this book.  Yeast, water, flour, salt. Perhaps the American version of Calvel’s classic is Bread by Jeffrey Hamelman of King Arthur in Norwich.  Also worth noting are both of Dan Leader’s books, Bread Alone and Local Breads, his latest offering, as well as Joe Oertiz’s The Village Baker, and Maggie Glezer’s Artisan Baking Across America

Monday, October 12, 2009

Sunday Dinner with pommes Anna


It’s Sunday and my daughter’s family and my brother Peter are coming by after the Giants’ game for hors d’oeuvres and dinner.  While it’s not cold out, it is rainy, so we’re going to have some fun appetizers and a comfy chicken with dumplings dinner.

I’ve poached two chickens in water with onions, celery, carrots, bay leaves, fresh thyme, parsley sprigs and a dozen whole peppercorns.  I removed the meat from the bones, which I returned to the stock for another hour of simmering, before I reduced what’s left to about 4 cups of rich broth.  The chicken meat has been cut into bite sized pieces and stashed in the fridge till later in the day.  I have cubed butternut squash, green beans, and fresh corn to simmer with the meat and thickened broth while the dumplings cook on top.

I picked some basil and made a batch of pesto with toasted pine nuts, garlic, olive oil, salt and parmesan cheese.  I roasted a Marina di Chioggia squash and pureed the flesh for squash gnocchi.  I moved on to pommes Anna, a potato dish for my Irish son-in-law, which we’ll eat with the starters. 

Pommes Anna requires the use of clarified butter to facilitate a non-stick result.  This is a classic French dish where thin slices of potato are layered in concentric circles in a cast iron or non-stick skillet before being baked in the oven.  The result is a beautiful, crisp potato cake with creamy interior. 


Clarifying butter requires melting it, (sweet, unsalted butter is best) and when the moisture has bubbled away, decanting the resulting liquid from the milk solids that remain in the bottom of the saucepan.  This butter has a much higher smoke point than non-clarified butter, so it’s ideal to cook with when one wants a butter flavor, but wants to avoid burning the butter.


The potatoes must be sliced very thin and uniformly for this dish to be successful.  I use a mandoline to accomplish this task.  While I have a stainless steel French mandoline, I opt for my plastic Japanese mandoline for most everyday jobs.  Both of these instruments have a blade that can be adjusted up or down to make thinner or thicker slices.  All come with a hand guard, which I recommend you use, as it is very easy to cut oneself deeply on these utensils. 

The skillet is placed over medium heat, buttered, and the potato slices are arranged in circles starting from the outside of the pan.  Each layer is sprinkled with salt and pepper (and grated onion &/or grated parmesan cheese) and brushed with the clarified butter.  A total of 6 to 8 layers of potatoes are used, the potatoes are compressed by pushing them down firmly, and the pan is placed in a hot oven to finish cooking.  When removed from the oven, it is inverted onto a serving plate and sprinkled with a little minced parsley.  Served in wedges, it is good hot or at room temperature.

Lastly, I’m making some gougeres, a cheese puff made with pate a choux, which is used to make éclairs.  Milk and egg are mixed and cooked with flour before allowing the dough to cool and then eggs are beaten in one at a time.  Flavored with Gruyere cheese, they are formed into spoon sized dollops, and double in size when baked in a hot oven.  These are also good hot or at room temperature.

Sunday, October 4, 2009

Fall Foods


So it’s clear that we are in early fall from the colors bursting forth on our hillsides.  The mornings are crisper and wood smoke is in the air.  The apple and winter squash crops are filling the farmers’ markets.  Last year I wrote about Craig Putnam’s Echo Hill Farm which was selling a large Italian squash known as Marina di Chioggia and what great squash gnocchi they make.  While I picked up one of these squashes this weekend from Craig, the market abounded with a large variety of unusual winter squash, beyond the traditional buttercup, butternut, acorn, Hubbard and delicata.

I saw Banana squash, Musque de Provence, Spaghetti squash, Pie Pumpkins, Muscat de Provence, Galeau d’Eysines, Red Kuri, Jarrahdale, Sunshine, Valencia, Amish Pie Squash and others whose names I can’t remember.  I was delighted with the abundance of varieties produced right here in the Upper Valley. 

If you look back to September and October of 2008 you will find columns on winter squash, so I won’t repeat that information here.

All the root vegetables are now also showing up in the markets including turnips, rutabagas, parsnips, carrots, red and golden beets, celeriac, red, yellow and sweet onions, shallots and potatoes.  These are the basics for some heart warming, stick to your ribs, comfort food, which warm not only our kitchens, but also our souls.  Casseroles, shepherd’s pie, pot roast, short ribs and similar dishes abound during this time of year.  The churches are having chicken pie and ham dinners with lots of fruit pies for dessert. 


Chicken pot pie is a favorite with many people. This time of the year, and before the frost kills off our gardens, you can still include green beans, spinach or Swiss chard, as well as roasted butternut squash or potato with the chicken and gravy that simmer while the crust cooks to a golden brown.  We also like chicken with dumplings, in which I include parsley and thyme from the garden to make the dumplings more flavorful.

This is the beef stew season and the number of recipes for this universal dish abound.  I’m inspired to make Boeuf Bourguignon, the classic French stew made with red wine after seeing Julie and Julia, the movie about Julia Child’s life and a young lady who blogs about cooking every recipe in Mastering the Art of French Cooking, in a single year. 


A classic Italian dish appropriate for this time of year is braciole in which thin slices of beef top or bottom round are stuffed with pork stuffing with cheese before being browned and braised in wine or stock. 

This is also the cabbage season, whether its green cabbage, Savoy cabbage or red cabbage.  Cole slaw with carrots and raisins is a classic, but we like our cabbage braised or steamed as a fall vegetable.  Stuffed cabbage leaves cooked in tomato sauce is heart warming on a cold evening.  Cabbage is also great in soups or as an addition to stews, and, of course, this is the time to make some sauerkraut, where the cabbage is fermented in its own juices created by salting the shredded vegetable.

Saturday, September 26, 2009

Eggplant


We’ve been harvesting eggplants from our garden for a number of weeks now.  I was first introduced to eggplants when I worked at the Blair Mansion Inn in Silver Spring, Maryland in 1971, while I was courting Rosemary in the District of Columbia area.  We made Eggplant Parmigiana there, and I remember prepping eggplants a bushel at a time.  We’d cut them into slices, salt the slices, let them sit for 30 minutes or more, then brush off the salt and liquid they had exuded, and bread them by dredging in flour, then beaten eggs, and fresh breadcrumbs.  Thereafter the breaded eggplant slices were par cooked in hot oil and frozen for future use.  When an order came in, the chef would splash some Marinara sauce on a sizzle plate, layer the eggplant with grated mozzarella, parmesan cheese, and sauce, and roast in a hot oven until the cheese was melted and browned and the eggplant cooked through. 


Eggplant, known as aubergine in Europe and the Middle East and brinjal in its native India and Pakistan, is a member of the nightshade family, Solanaceae, and closely related to tomatoes, potatoes and tobacco.  A perennial plant in temperate climes, Solanum melongena is grown as an annual in New England.  While we know it primarily as a dark purple, elongated ovoid, it also grows in a variety of shapes (short and squat to long and thin, often curved, to even egg shaped ones) and colors (pink, yellow, green, white and stripped).  As it is related to tobacco, historically its nicotine alkaloids contributed to a bitter flavor, which was purged by salting the sliced flesh.  Over the years, breeders have selected against the bitterness, so while today it no longer remains a problem for cooks, salting eggplant before cooking still has benefits in lessening the absorbent properties of its flesh.  Anyone who has sauted some eggplant knows it will soak up all the oil you put in the pan before it starts to brown. The application of salt collapses the cell walls of the eggplant flesh, expelling air as well as liquid, and leaving less space for oil to enter and become trapped. 


One of the most famous Arabic eggplant dishes is Iman bayaldi, “the priest fainted.”  In this dish, the eggplant is stuffed with onions and tomatoes and cooked in copious amounts of oil, most of which it absorbs.  Supposedly the priest fainted either because the dish was so delicious, or later when he heard how much oil his wife had used to make the dish. 


In an earlier column I wrote about Ratatouille, the French dish comprised of eggplants, tomatoes, zucchini and onions.  The Greeks have their Moussaka, a native dish that combines lamb with eggplants, tomatoes and cheese, the Italians their Melanzane alla parmigiana with eggplants, tomatoes and cheese, and the Middle East its baba ghanoush where creamy roasted eggplant is combined with tahini (ground sesame seeds), lemon and garlic.  These are just a few examples of world class dishes comprised of eggplant, so if you haven’t tried any lately, they are available from local sources now, so it’s a good time to check out this savory vegetable known as “vegetarian’s meat.”


Melanzane alla parmigiana
Eggplant Parmesan
Serves 6


3 Eggplants
2 Tablespoons salt
3 eggs, beaten
1 cup all purpose flour seasoned with a 1/2 tsp. salt & a grinding of pepper
2 cups of bread crumbs and possibly more
2 quarts canola or vegetable oil
2 cups Marinara sauce
1 1/2 cups grated mozzarella
1 cup grated parmesan cheese
1/3 lb sliced sharp provolone


Slice the eggplant into 1/2" rounds.  Sprinkle with the salt and drain in a colander for 30 minutes or more.


Place the seasoned flour and bread crumbs in separate bowls.  Beat the eggs in a third bowl.  Pat the moisture off the eggplant, dip each piece of eggplant in the flour, shaking off the excess.  Place floured eggplant in the eggs and turn over to coat both sides.  Place in bread crumbs and turn over to coat.  Place breaded eggplant on a rack while you do the rest of them.


Deep fry the breaded eggplant in 375 degree oil for a minute or so on each side, until the bread crumbs are browned and the eggplant is just cooked through.  Drain on an absorbent towel.


Select a baking dish and cover the bottom with a layer of Marinara sauce.  Place eggplant over the bottom, sprinkle on half the grated mozzarella and 1/2 the parmesan cheese.  Cover with a layer of Marinara sauce and repeat a second layer, ending with sauce.  Cover the top with sliced provolone.


Bake uncovered in a 375 degree oven for 20 -25 minutes or until hot and bubbly with the top browned.
Let rest for 15 minutes at least before serving.  Good at room temperature, and better the next day.


Thursday, September 17, 2009

Apples

This year’s apple crop is starting to hit the markets.  I bought a peck bag that included my choice of Ginger Gold, Macoun, McIntosh, Honey Crisp and Paula Red, some for eating and some for an apple tart.  I know, it’s “American as apple pie,” but Rosemary makes the pies and I make the tarts.  She’s Fanny Farmer and I’m Julia Child, or maybe Paul Bocuse.


Apples, which are related to pears, are part of the rose family.  Malus demestica consists of 15,000 or more varieties, or which some 2,000 are American.  Originating is Asia Minor, apples are grown all over the world, and are the most popular fruit not only in the US, but also Britain, France and Germany.  China, of course, is the world’s leading producer, the US second while Iran and Turkey vie for third. 


The apple is propagated primarily by the asexual act of grafting, as planting an apple seed will not result a seedling with the same characteristics as its parent.  In fact, the result is often radically different.  When Johnny Appleseed hastened westward to keep ahead of a burgeoning population, planting his orchards of apples, the settlers found that most of the apple crop consisted of “spitters,” that were so astringent as to be inedible, but they made great cider, which converted into alcohol, so his coming was legend.  While hard cider is fermented, applejack, apple brandies and Calvados are distilled apple liquors.


Cider apples (real tart) are one of the four apple groups, the others being dessert or eating apples (crisp and juicy), cooking apples (tart when raw, balanced when cooked), and now dual purpose apples like Golden Delicious and Granny Smith. 


Apples are most associated with desserts, and American originals include apple crisp, apple grunt, and apple pandowdy.  Applesauce, flavored with cinnamon, is eaten with pork, and apples are stewed with red cabbage and braised with chestnuts, and included in Waldorf Salad.  Sliced apples, chutneys and cheese are a common appetizer, but most apple concoctions are for after the main meal.  Apples, with their cell-wall pectins, have good jelling characteristics when cooked down, so they are often made into apple jelly.


Sliced apple will oxidize to an unappetizing brown in a short time if left untreated.  This browning can be prevented by tossing peeled, or sliced apples, with an acidulated liquid like lemon juice, where the high acid environment slows down the natural browning process.


Most varieties of apple store well in an atmosphere rich in carbon dioxide, which restricts ethylene gas from ripening the fruit prematurely, so even local apples are available well into the winter and early spring after a fall harvest. 


“An apple a day keeps the doctor away,” may be an old saw, but it has a lot of truth in it.  While apples are not high in Vitamin C and other antioxidant compounds, they show preventive properties relative to cancers of the colon, prostate and lungs.  As they are cholesterol free, contain fiber and are bulky, they assist with bowel cleansing, heart disease and weight loss, which many of us could benefit from.


So be it a glass of cider, an apple pie or the crisp crunch of a snappy new McIntosh, now is the time to enjoy our most prolific fruit that grows all about us.


Apple Golden-Brown Betty
Serves 6-8


Vegetable oil cooking spray
1 1/2 cups dry, stale cornbread crumbs, finely crumbled
1/2 cup brown sugar
1/4 cup white or Turbinado sugar
1 1/4 tsp ground cinnamon
1/4 tsp ground allspice
1/4 tsp ground  ginger
1/8 tsp ground cloves
A few gratings of nutmeg
7 or 8 (3 lb) apples, peeled, cored, and sliced into 1/3" wedges
2 lemons, halved
1/3 cup frozen apple juice concentrate, thawed
1/2 cup (1 stick) butter


Ice cream, custard sauce, yoghurt or whipped cream


Preheat oven to 375 degrees.  Spray a shallow 8 1/2" X 11" glass or enamel baking dish with vegetable oil and set aside.


Toss together the crumbs, sugars and spices in a medium bowl.  Set aside.


Place the apple slices in a second medium bowl.  Squeeze the lemons over the apples, straining out the seeds.  Toss the apples so they are all coated with lemon juice.  This will prevent browning.


Sprinkle 2 tablespoons of the crumb mixture on the bottom of the prepared dish.  Follow with half the apples.  Pour the apple juice concentrate over the apples, then scatter about half the crumb mixture.  Dot with half the butter.  Repeat a layer of apples and then the rest of the crumb mixture and the rest of the butter.


Cover the dish tightly with aluminum foil and bake until the apples are tender, 30 to 40 minutes.  Remove the foil, increase the heat to 400 degrees and let bake until the top crumbs are deeply golden and crisp, about 10 minutes.  Serve, warm but not hot, with one of the accompaniments.